Terminal Basics
Visual Studio Code includes a full featured integrated terminal that starts at the root of your workspace. It provides integration with the editor to support features like links and error detection. The integrated terminal can run commands such as mkdir and git just like a standalone terminal.
Opening a terminal is blocked when a workspace is in Restricted Mode to prevent shells from automatically executing code based on workspace contents.
You can open a terminal as follows:
- From the menu, use the Terminal > New Terminal or View > Terminal menu commands.
- From the Command Palette (⇧⌘P (Windows, Linux Ctrl+Shift+P)), use the View: Toggle Terminal command.
- In the Explorer, you can use the Open in Integrated Terminal context menu command to open a new terminal from a folder.
- To toggle the terminal panel, use the ⌃` (Windows, Linux Ctrl+`) keyboard shortcut.
- To create a new terminal, use the ⌃⇧` (Windows, Linux Ctrl+Shift+`) keyboard shortcut.
VS Code's terminal has additional functionality called shell integration that tracks where commands are run with decorations on the left of a command and in the scrollbar:
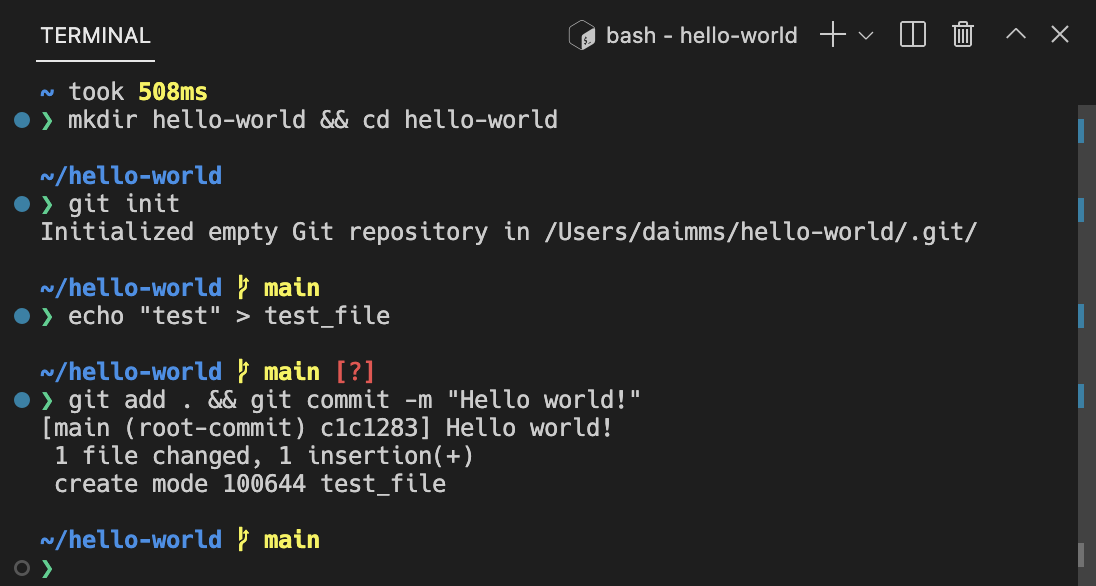
If you prefer to work outside VS Code, open an external terminal with the ⇧⌘C (Windows, Linux Ctrl+Shift+C) keyboard shortcut
Terminal shells
The integrated terminal can use various shells installed on your machine, with the default being pulled from your system defaults. Shells are detected and presented in the terminal profiles dropdown.
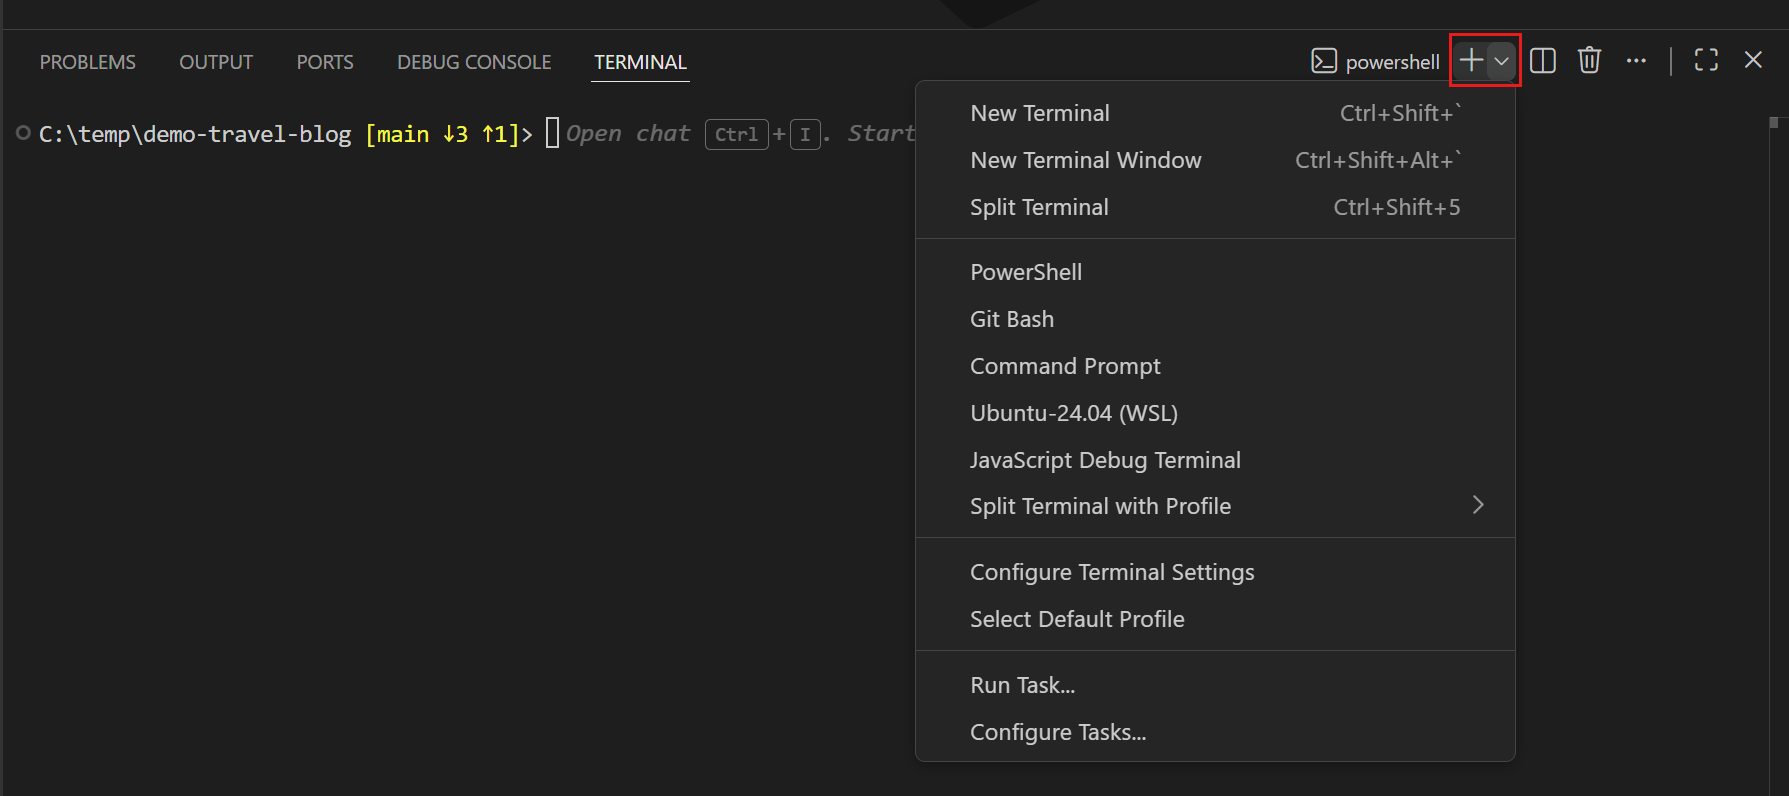
You can learn more about configuring terminal shells in the terminal profiles article.
Managing terminals
The terminal tabs UI is on the right side of the terminal view. Each terminal has an entry with its name, icon, color, and group decoration (if any).
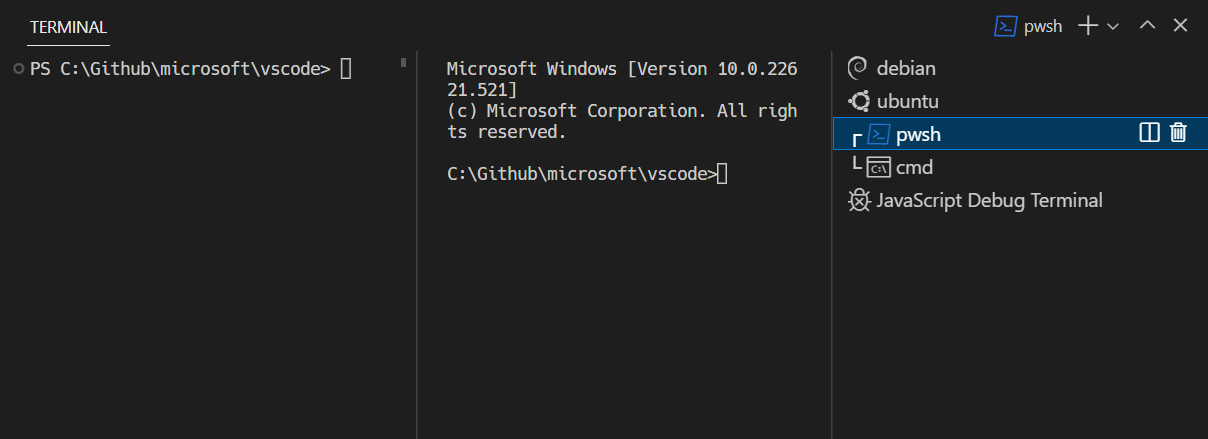
Add terminal instances by selecting the + icon on the top-right of the TERMINAL panel, selecting a profile from the terminal dropdown, or by triggering the ⌃⇧` (Windows, Linux Ctrl+Shift+`) command. This action creates another entry in the tab list associated with that terminal.
Remove terminal instances by hovering a tab and selecting the Trash Can button, selecting a tab item and pressing Delete, using Terminal: Kill the Active Terminal Instance command, or via the right-click context menu.
Navigate between terminal groups using focus next ⇧⌘] (Windows, Linux Ctrl+PageDown) and focus previous ⇧⌘[ (Windows, Linux Ctrl+PageUp).
Icons may appear to the right of the terminal title on the tab label when a terminal's status changes. Some examples are a bell (macOS) and for tasks, displaying a check mark when there are no errors and an X otherwise. Hover the icon to read status information, which may contain actions.
Groups (split panes)
Place multiple terminals side-by-side and create a group by splitting a terminal:
- Hover over an entry in the list of terminals on the right and select the inline split button.
- Right-click the context menu and select the Split menu option.
- Alt and click on a tab, the + button, or the single tab on the terminal panel.
- Trigger the ⌘\ (Windows, Linux Ctrl+Shift+5) command.
The working directory for the new terminal depends on the terminal.integrated.splitCwd setting.
Navigate between terminals in a group by focusing the previous pane, ⌥⌘← (Windows, Linux Alt+Left), or the next pane, ⌥⌘→ (Windows, Linux Alt+Right).
Dragging and dropping tabs in the list rearranges them. Dragging a tab into the main terminal area allows moving a terminal from one group to another.
Moving a terminal into its own group can be done with the Terminal: Unsplit Terminal command through the Command Palette or in the right-click context menu.
Terminals in editor area
You can open terminals in the editor area (terminal editors) with the Terminal: Create New Terminal in Editor Area command, the Terminal: Create New Terminal in Editor Area to the Side command, or by dragging a terminal from the terminal view into the editor area. Terminal editors are presented like regular editor tabs:
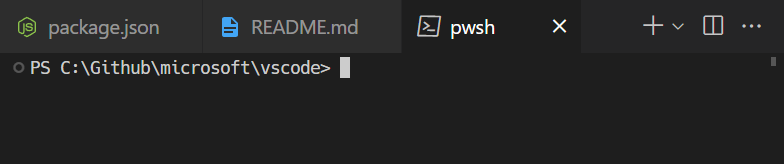
You can have terminal editors on either side or arranged in multiple dimensions using the editor group layout system, e.g. PowerShell and WSL terminals stacked to the right of file editors:
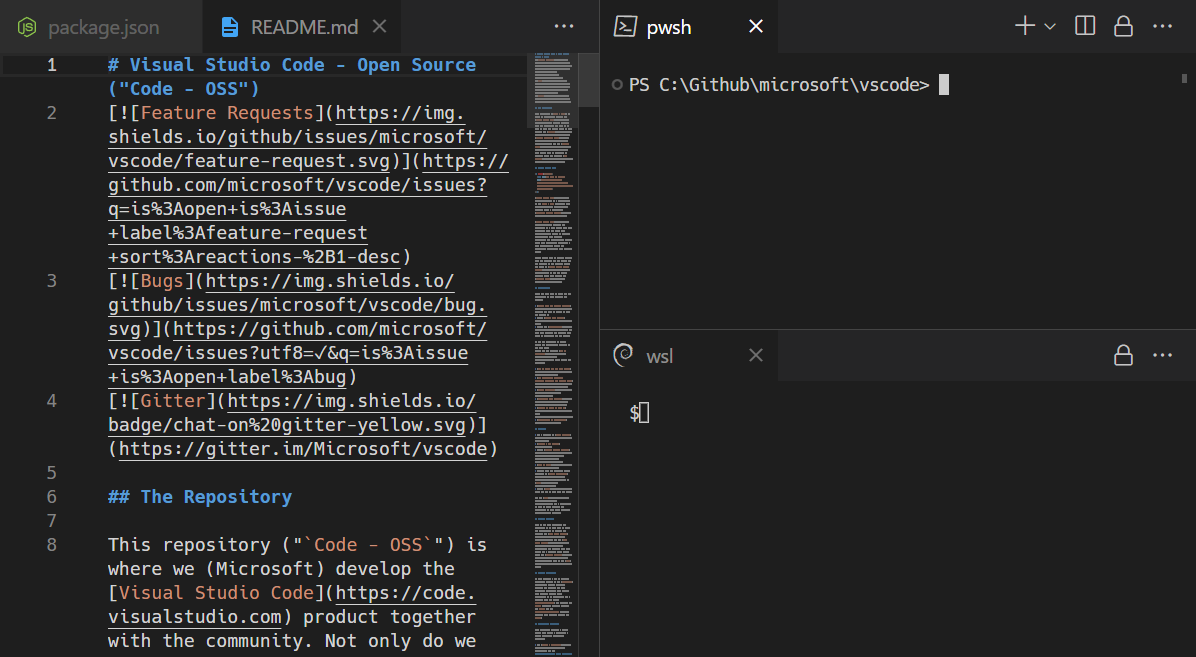
The
terminal.integrated.defaultLocation
setting can change the default view or editor area terminal location.
Terminals in new windows
Opening a terminal in a new VS Code window is possible in a few different ways:
- Use ⌃⇧⌥` (Windows, Linux Ctrl+Shift+Alt+`)
- Right-click the terminal tab if you have multiple terminals, or left-click the tab if you only have a single terminal opened. Then select Move Terminal to New Window
- Select the New Terminal Window entry that's available in several different menus
Navigating the buffer
The content in the terminal is called the buffer, with the section right above the bottom viewport being called "scrollback". The amount of scrollback kept is determined by the
terminal.integrated.scrollback
setting and defaults to 1000 lines.
There are various commands available to navigate around the terminal buffer:
- Scroll up a line - ⌥⌘PageUp (Windows Ctrl+Alt+PageUp, Linux Ctrl+Shift+Up)
- Scroll down a line - ⌥⌘PageDown (Windows Ctrl+Alt+PageDown, Linux Ctrl+Shift+Down)
- Scroll up a page - PageUp (Windows, Linux Shift+PageUp)
- Scroll down a page - PageDown (Windows, Linux Shift+PageDown)
- Scroll to the top - ⌘Home (Windows Ctrl+Home, Linux Shift+Home)
- Scroll to the bottom - ⌘End (Windows Ctrl+End, Linux Shift+End)
Command navigation is also available (see shell integration):
- Scroll to the previous command - ⌘↑ (Windows, Linux Ctrl+Up)
- Scroll to the next command - ⌘↓ (Windows, Linux Ctrl+Down)
Scrolling will happen instantaneously, but can be configured to animate over a short duration with the terminal.integrated.smoothScrolling setting.
Links
The terminal features sophisticated link detection with editor integration and even extension contributed link handlers. Hover over a link to display an underline, then hold the Ctrl/Cmd key and click.
These built-in link handlers are used in the following priority order:
-
URIs/URLs: Links that look like URIs, such as
https://code.visualstudio.com,vscode://path/to/fileorfile://path/to/filewill open using the standard handler for the protocol. For example,httpslinks will open the browser.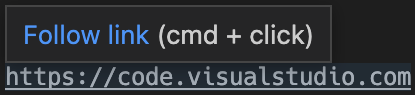
-
File links: Links to files that have been verified to exist on the system. These will open the file in a new editor tab and support many common line/column formats such as
file:1:2,file:line 1, column 2.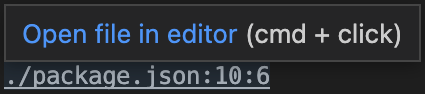
-
Folder links: Links to folders are similar to file links but will open a new VS Code window at the folder.

-
Word links: Fallback link type that uses the terminal.integrated.wordSeparators setting. The setting defines word boundaries and make nearly all text into words. Activating a word link searches the workspace for the word. If there is a single result it will open, otherwise it will present the search results. Word links are considered "low confidence" and will not show an underline or tooltip unless you hold the Ctrl/Cmd key. They also have limited support for line and column suffixes.
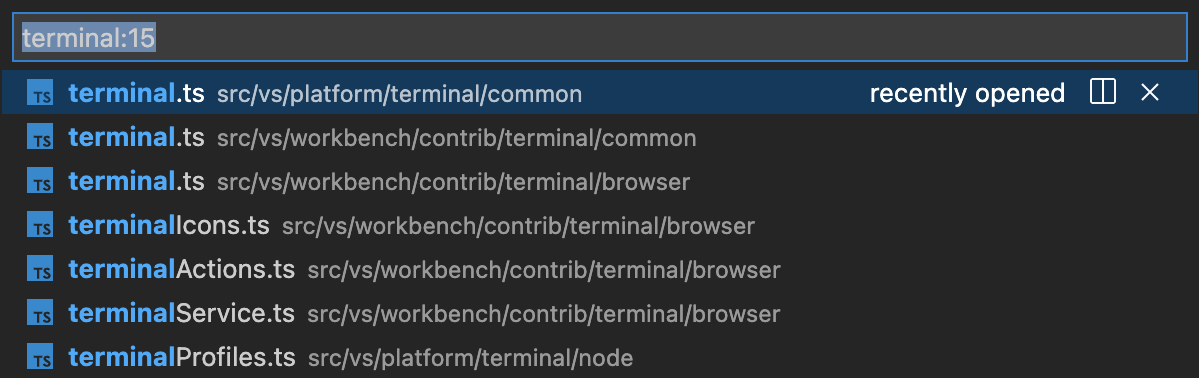
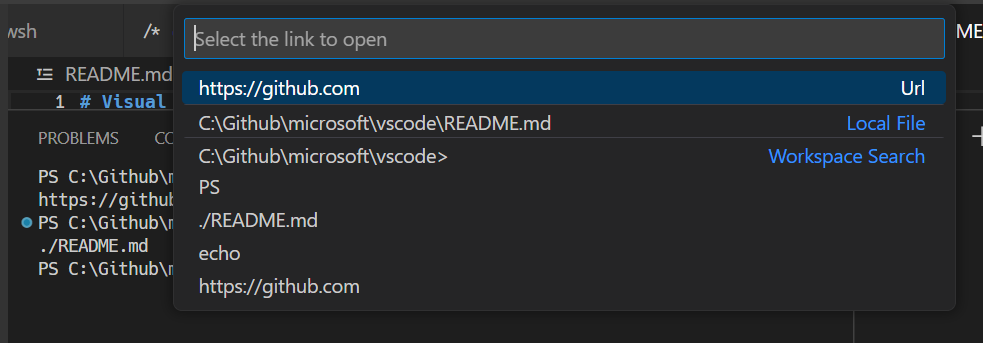
The Open Detected Link command (⇧⌘G (Windows, Linux Ctrl+Shift+G)) can be used to access links via the keyboard:
If link verification causes performance issues, like in high latency remote environments, disable it via the terminal.integrated.enableFileLinks setting.
Extensions handling links
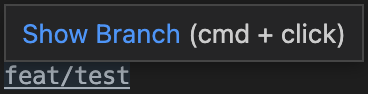
Extensions can contribute link providers which allow the extension to define what happens when clicked. An example of this is the GitLens extension detecting Git branch links.
Keyboard accessibility
Links are keyboard accessible through several commands that open links based on the type of link.
- Terminal: Open Last Local File Link - Opens the most recent local file link. No default keyboard shortcut.
- Terminal: Open Last URL link - Opens the most recent URI/URL link. No default keyboard shortcut.
- Terminal: Open Detected Link... - Opens a searchable Quick Pick with all detected links, including word links. The default keyboard shortcut is Ctrl/Cmd+Shift+O, which is the same as the Go to Symbol in Editor keyboard shortcut.
Copy & paste
The keyboard shortcuts for copy and paste follow platform standards:
- Linux: Ctrl+Shift+C and Ctrl+Shift+V; selection paste is available with Shift+Insert
- macOS: Cmd+C and Cmd+V
- Windows: Ctrl+C and Ctrl+V
Copying is done automatically on selection when terminal.integrated.copyOnSelection is enabled.
By default, there is a warning when pasting multiple lines, which can be disabled with the terminal.integrated.enableMultiLinePasteWarning setting. This is only done when the shell does not support "bracketed paste mode". When that mode is enabled, the shell is indicating that it can handle multiple line pasting.
Using the mouse
Right-click behavior
The right-click behavior differs based on the platform:
- Linux: Show the context menu.
- macOS: Select the word under the cursor and show the context menu.
- Windows: Copy and drop selection if there is a selection, otherwise paste.
This can be configured using the terminal.integrated.rightClickBehavior setting. The options are:
default- Show the context menu.copyPaste- Copy when there is a selection, otherwise paste.paste- Paste on right-click.selectWord- Select the word under the cursor and show the context menu.nothing- Do nothing and pass event to terminal.
Column selection
Press Alt and left-click drag to select a rectangle of text inside the terminal instead of the regular selection of a line.
Reposition the cursor with Alt
Alt and left-click will reposition the cursor to underneath the mouse. This works by simulating arrow keystrokes, which may not work reliably for some shells or programs. This feature can be disabled with the terminal.integrated.altClickMovesCursor setting.
Mouse events mode
When applications running in the terminal turn on mouse events mode, such as Vim mouse mode, mouse interaction is sent to the application instead of the terminal. This means that clicking and dragging will no longer create a selection. Terminal selection can be forced by holding the Alt key on Windows and Linux, this can also be done with the Option key on macOS but requires enabling the terminal.integrated.macOptionClickForcesSelection setting first.
Find
The integrated terminal has find functionality that can be triggered with ⌘F (Windows, Linux Ctrl+F).
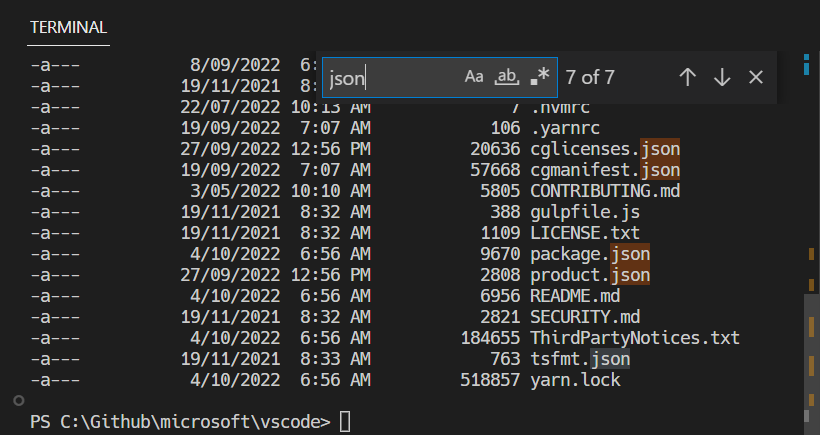
Ctrl+F can be sent to the shell by removing the workbench.action.terminal.focusFind command from commands to skip shell.
Run selected text
To use the runSelectedText command, select text in an editor and run the command Terminal: Run Selected Text in Active Terminal via the Command Palette (⇧⌘P (Windows, Linux Ctrl+Shift+P)), the terminal will attempt to run the selected text. If no text is selected in the active editor, the entire line that the cursor is on will run in the terminal.
Also run the active file using the command workbench.action.terminal.runActiveFile.
Maximizing the terminal
The terminal view can be maximized by clicking the maximize panel size button with the upwards chevron icon. This will temporarily hide the editors and maximize the panel. This is useful to temporarily focus on a large amount of output. Some developers use VS Code as a standalone terminal by opening a new window, maximizing the panel, and hiding the side bar.
Note that the panel can only be maximized if its alignment option is set to Center.
Select all
There is a Terminal: Select All command, which is bound to Cmd+A on macOS, but does not have a default keyboard shortcut on Windows and Linux as it may conflict with shell hotkeys. To use Ctrl+A to select all, add this custom keyboard shortcut:
{
  "key": "ctrl+a",
  "command": "workbench.action.terminal.selectAll",
  "when": "terminalFocus && !isMac"
},
Drag and drop file paths
Dragging a file into the terminal will input the path into the terminal, with escaping to match the active shell.
Automating terminals with tasks
The Tasks feature can be used to automate the launching of terminals, for example, the following .vscode/tasks.json file will launch a Command Prompt and PowerShell terminal in a single terminal group when the window starts:
{
  "version": "2.0.0",
  "presentation": {
    "echo": false,
    "reveal": "always",
    "focus": false,
    "panel": "dedicated",
    "showReuseMessage": true
  },
  "tasks": [
    {
      "label": "Create terminals",
      "dependsOn": [
        "First",
        "Second"
      ],
      // Mark as the default build task so cmd/ctrl+shift+b will create them
      "group": {
        "kind": "build",
        "isDefault": true
      },
      // Try start the task on folder open
      "runOptions": {
        "runOn": "folderOpen"
      }
    },
    {
      // The name that shows up in terminal tab
      "label": "First",
      // The task will launch a shell
      "type": "shell",
      "command": "",
      // Set the shell type
      "options": {
        "shell": {
          "executable": "cmd.exe",
          "args": []
        }
      },
      // Mark as a background task to avoid the spinner animation on the terminal tab
      "isBackground": true,
      "problemMatcher": [],
      // Create the tasks in a terminal group
      "presentation": {
        "group": "my-group"
      }
    },
    {
      "label": "Second",
      "type": "shell",
      "command": "",
      "options": {
        "shell": {
          "executable": "pwsh.exe",
          "args": []
        }
      },
      "isBackground": true,
      "problemMatcher": [],
      "presentation": {