Agent plugins

Agent plugins bundle multiple customizations into one installable package. In this guide, you will inspect a plugin before installing it, use a plugin-provided command, and decide when a plugin is a better fit than separate local customizations.
Prerequisites
Before you start, install VS Code, enable AI features, and sign in to GitHub Copilot. Then enable support for agent plugins with chat.plugins.enabled .
Start with the problem plugins solve
Imagine your team has a review workflow that uses three pieces:
- A skill that explains how to review changes in your repository.
- A custom agent that only has read-only tools.
- An MCP server that looks up issue metadata.
You could ask every teammate to configure those pieces one by one. A plugin packages them together so the workflow can be discovered, installed, updated, and disabled as one unit.
Plugins can include any combination of:
- Slash commands
- Agent skills
- Custom agents
- Hooks
- MCP servers
Use plugins when the value comes from the pieces working together. Use individual customizations when you only need one small behavior in one workspace.
| Use | Good fit | Not a good fit |
|---|---|---|
| Plugin | Share a complete workflow across a team. | One personal prompt you rarely reuse. |
| Skill | Load task-specific instructions, scripts, and resources on demand. | A full workflow that also needs agents, hooks, or MCP servers. |
| Custom agent | Create a reusable role with its own instructions and tool limits. | A package that should install multiple customization types together. |
Browse and inspect a plugin
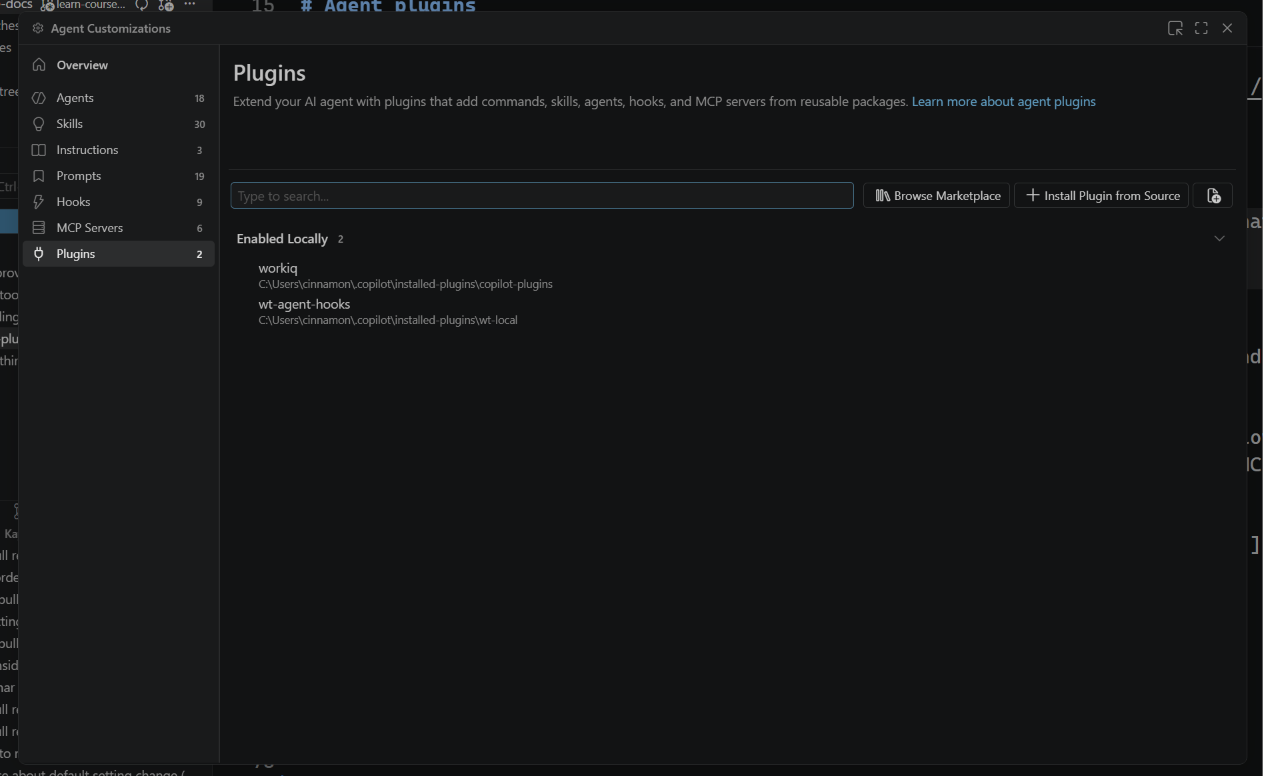
After you enable chat.plugins.enabled , VS Code discovers plugins from the copilot-plugins and awesome-copilot marketplaces by default. You can add more with chat.plugins.marketplaces .
-
Open the Chat view.
-
Select the cog, then open Agent Customizations.
-
Select Plugins in the left menu.
-
Pick a plugin that matches a workflow you recognize, such as testing, code review, or documentation.
-
Before installing, inspect what it includes. Look for skills, agents, hooks, and MCP servers.
-
Install it only if you trust the source and understand what it adds.
From there, you can:
- Browse the marketplace.
- Install a plugin from source.
- Create your own plugin.
- Review which customizations are already installed.
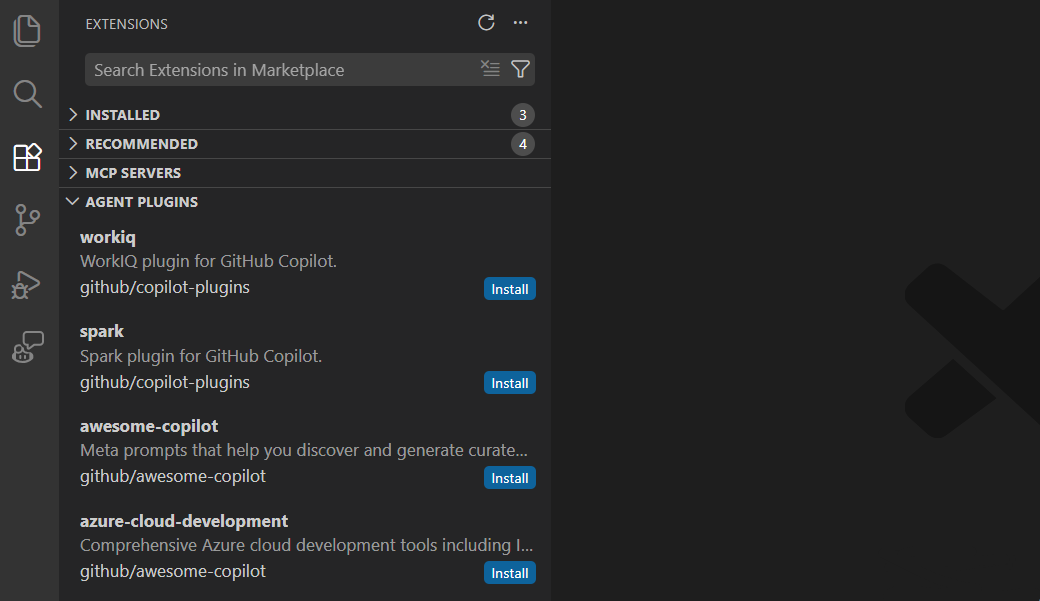
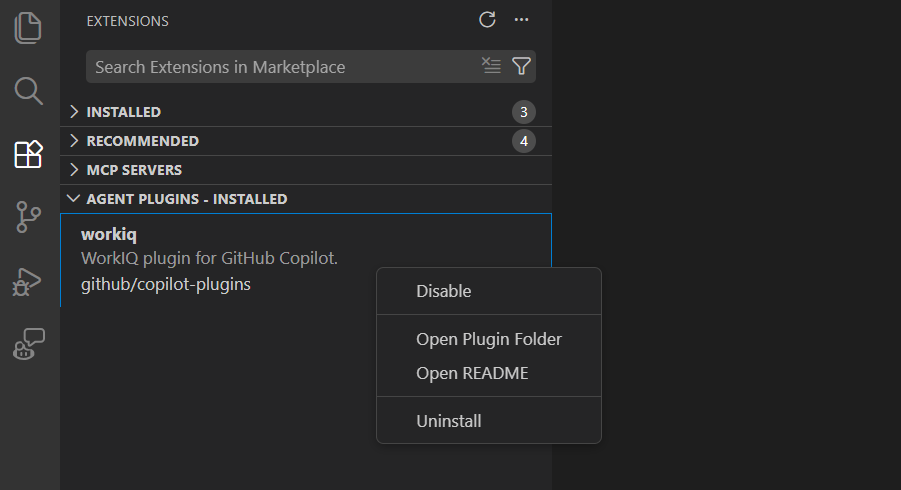
After installation, the plugin's customizations appear alongside your local ones in the Agent Plugins - Installed section of the Extensions view.
Try a plugin command
Plugins can expose custom agents, skills, slash commands, and MCP servers all in one place. In chat, you can invoke plugin content with slash commands or by selecting the relevant customization from the picker.
For example, after installing the awesome-copilot plugin, you can run /awesome-copilot:suggest to have the plugin look across your project and recommend related collections you can install next.
Try this sequence:
-
Open a repository you use for development.
-
Start a new agent chat.
-
Type
/and find the plugin command. -
Run the command and review what it recommends.
-
If it recommends more plugins, inspect those plugins before installing them.
The goal is not to install everything. The goal is to see how a plugin can bring a complete workflow into chat with one command.
Plugins can run hooks and MCP servers on your machine. Review the contents and publisher before you install one.
Read the manifest
When you inspect a plugin repository, start with plugin.json. The manifest defines the plugin identity, and the folders beside it hold the skills, agents, hooks, and MCP server definitions.
A plugin that follows the Agent Plugins standard declares the schema it targets:
{
  "$schema": "https://agent-plugins.org/schemas/1.0.0/plugin.schema.json",
  "name": "team-review-tools",
  "description": "Review workflow for the team repository"
}
Components sit in fixed locations rather than manifest fields: skills in skills/, MCP servers in mcp.json, and Copilot-specific parts such as agents and hooks under